پاکستان میں Mostbet com ویب سائٹ ملاحظہ کریں، اور آپ یقینی طور پر کھیلوں پر شرط لگانے یا آن لائن کیسینو میں کھیلنے کے لیے یہاں واپس آنا چاہیں گے۔ کھیلوں کے شائقین کو ایونٹس کے ایک بڑے انتخاب، مختلف پروموشنز اور بونسز، مفت بیٹس، مفت گھماؤ اور زیادہ مشکلات تک رسائی حاصل ہے۔ اور کھیل کو مزید آسان بنانے کے لیے، ہم نے ایک موبائل ایپلیکیشن تیار کی ہے جسے آپ آسانی سے اپنے فون پر انسٹال کر سکتے ہیں۔

Tips for Tuesday! Photograph Tips, evoking real emotions.

So you may have noticed that I didn’t post a Weekend in Crappy Pics yesterday (let’s pretend you care), that was either because:

A. Something secretive happened over the weekend and I can’t talk about it

or

B. Nothing happened over the weekend and I literally have nothing to talk about.


You decide.


Anyway, I’m working on a super duper writey thingy this week which has taken all of my free time (9:00 pm-9:30 pm)…and my brain cells, so today I give you a repost. BUT I can almost guarantee that most of you haven’t read it. What’s that called, “New to You”?

Besides, with the holidays approaching, I thought you could use some photography tips. Enjoy!


___________________________________________________


I’ve received several comments and questions regarding my pictures. Many readers want to know how I manage to capture the perfect expression in each of my photos. So today, I’m going to share my secret with you.

The trick is to know your subject on a deep psychological level. Know what motivates them and what saddens them.  Know their hopes, their dreams, their fears. Basically psychoanalyze them for vulnerabilities. If they’re not family or close friends you’ll either need to stalk them or have them fill out a questionnaire prior to photographing.

The good news is, it’s pretty easy to get someone to smile….

“Hold that up and we’ll buy a puppy!”

But you have to choose the perfect statement to capture the subtle nuances of almost any other emotion…

Depression

“That wasn’t good enough. No puppy for you.”

Despair

“Santa is dead.”

Crushing Guilt

“Santa’s autopsy came back. Turns out the stress of your toy demands killed him.”

Processing Disgust

“Your sister just sneezed on that.”

This technique works on animals too.

WTF?

“The vet called. She said you’ll die if you keep eating cat shit.”
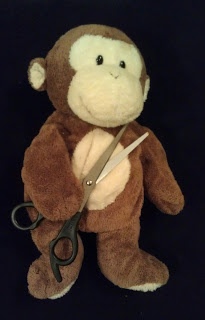
This look was accomplished by standing in the corner and loudly yelling at the photographer to “hurry up! We have an appointment to get his testicles cut off after this”.

That was actually true. But we sang “Jingle Balls” on the ride over to lighten the mood.

My suggestion, is that you create a bank of go-to phrases capable of evoking every emotion. Also, get a second job because your children’s therapy sessions may prove to be expensive. But hey- great pics are priceless!


After reading this, I strongly suggest you head over to my sponsor,  The Shitastrophy, she’s offering a free After-Halloween Candy-Holic evaluation & intervention (which may or may not be her stealing your candy). 

Tips for Tuesday: How to renovate your laundry room all by yourself!


That’s right, I said “all by yourself”, because who wants to hear “How much is this going to cost us?”, “Seriously? C’mon, football is on.”, and my personal favorite…

“What’s wrong with our laundry room?”

No, Brian. What’s right with our laundry room? The shelving has collapsed, the wallpaper is a threat to anyone who suffers from seizures, and the floor & sink are stained beyond the powers of bleach.

This called for a major overhaul.

*The photo above was our actual laundry room, designed by the previous owners and filled with crap by us.


Step 1 – Empty the room

The first thing you need to do is empty the whole laundry room (except the washer & dryer) and arrange everything into a huge pile in your garage. This pile will hide all of your purchases until it’s time to renovate (Brian gets twitchy if he sees the tangible evidence of money spent).

I hid a new utility sink, complete with espresso cabinet, in our garage for two weeks. He walked around it everyday, completely oblivious.

Step 2: Paint the room

If you have wallpaper, remove it. But do yourself a favor and rent a wallpaper steamer from a local hardware store. That DIFF stuff can kiss my ass. Luckily for me, our wallpaper peeled off like ugly gift wrapping paper. Even it knew it was time to go.

Spackle/repair any holes.

Paint all of the walls except for the area behind the washer & dryer (we’ll do that later). Then paint the trim and baseboards.


-Here’s a baseboard tip:

When your wall paint is dry, run a thin bead of paintable caulk where the baseboard meets the wall, smoothing it with your finger. Once the caulk dries, take painter’s tape and tape about 1/2 inch ABOVE the baseboard.

Paint the baseboard and the area above the baseboard.

This creates a clean look and makes your baseboards appear chunkier and classier!


Step 3: Floors

Before installing the floors, you’ll need to move the washer and dryer out of the room. Don’t worry, this was surprisingly simple *If you have a gas dryer, I’m clueless and you’re on your own.

Unplug the dryer and separate the air vent thingy from the wall. It’s usually held together by a simple clamp.


Then turn off the water to the washer and unscrew the hoses. This is exactly like taking a yard hose off, but indoors.

And don’t forget to unhook the drain hose (the hose that empties the dirty water). That’s usually held in place by a simple clamp too, like the dryer vent thingy.


Next, put those moving discs under the washer and dryer and push them to where they won’t be in your way. I parked mine in front of the stove.

I hope you kept your paint can out because now’s the time to paint the wall behind the washer & dryer.


Ok…the floors…

It was important to me to do this on my own and on a budget, so I decided to use Peel & Stick floor tiles. After doing some research and reading a ton of reviews, I purchased a Peel & Stick faux hardwood floor that looks soooo real and was only .98 cents per sq foot! Plus it could be applied directly to my old floor!

It’s by Style Selection and can be found at Lowes. Here’s the description:

Style Selections 4-in W x 36-in L Oak Luxury Vinyl Plank

4-in W x 36-in L Oak Luxury Vinyl Plank

  • Realistic wood design and texture
  • More resilient than wood or laminate, with stain and scratch resistance
  • Easy to install in 3 simple steps with a fast peel-and-stick application
  • Perfect in high-traffic areas

*Read the instructions for the flooring you choose. My peel & stick only required me to wash the old floor with soap & water. Now that’s my kind of prep work!


– Flooring Tip- Cutting around tricky trim.

Did I mention that Peel & Stick tile can be cut with scissors?! Easy-peasy!

Once the floor is laid, move the washer & dryer back into the laundry room and hook them back up. Just reverse what you did to unhook them.


Step 4 – Hanging the cabinets

Once you’ve selected your cabinets (to save money, I purchased ready-to-finish cabinets at Lowes & painted them), you’ll probably wonder how the hell you’re going to hang them on your own. You build a ledge! No, you’re not jumping off.

Buy a 1×2 piece of wood that’s the length of (or longer than) your cabinets. Using a level, screw it into the studs. Prop the cabinet onto the ledge, hold it in place with one hand (or your shoulder) and screw it into the wall with the other.

Remove the ledge and repair screw holes…or don’t, I don’t really care.

Step 5 – Lighting

Turn on your ceiling light, then go to your junction box and turn off the power to the laundry room. If the ceiling light is off when you come back then you know you hit the right breaker. BUT DOUBLE CHECK it by flipping the light switch up & down. You never know, I’m sure there’s someone that’d like to see you electrocuted.

Remove old lighting by unhooking the wires (red, black, & copper). Following the instructions to install your new light (hooking red to red, black to black, & copper to copper or copper to screw). *The copper wire is sometimes referred to as the ground wire.

Step 6 – Decorate!

I got halfway through step 6 before Brian received the credit card bill and begged me to stop. So here’s what I have so far:

I’m pretty sure I bought everything from Marshall’s. And if you’ve read this, then you know I love me some Marshall’s!

I present to you, the before & after…

Ahhh…

Do you have any projects lined up? Shoot me an email if you have any questions about it (but that doesn’t mean I’ll know the answer).

Top Mommy Blogs - Mom Blog Directory

Tips for Tuesday! How to cut your Child’s hair – a guest post!

We’re currently on Day 3 of our Disney vacation and my inner thigh chaffing is being kept under control thanks to a last minute purchase of Gold Bond Medicated Powder. Brian laughed when I bought it, but guess who’s begging to use it now. Thaaat’s right.

P.S. Burglars – Our house is not empty, but Mr. Bojangles would still enjoy some additional company.

aww, I think he like you!


Today’s tip is brought to you by the very clever, very awesome, and very funny (hysterical, really), Jenn from Something Clever 2.0. Her blog has always been one of my favorite reads because she’s not afraid to stir up a little trouble by saying exactly what we’re all thinking – like this post about Halloween, her ass gets all judgy on you…yes YOU! I suggest you read it and take her advice.


How to Cut Your Child’s Hair in Ten Easy Steps

So you’ve decided to cut your kid’s hair. I’ve been cutting my son’s hair for three years (since his first cut), and oftentimes, I’m asked how I do it. It’s very simple. However, if you’ve never cut hair before, stop right there. Cutting hair is tricky, and cutting a squirmy person’s hair is damn near impossible. Practice on yourself and your spouse for a minimum of ten years before you attempt this feat.
20131016-115617.jpg

Step One: Put your child in a high chair. Bonus points if you have one with a five-point harness. Super bonus points if your kid is asleep and you have two friends to hold him down.

Step Two: Carefully wrap a towel around the- oh, who am I kidding, those tiny little itchy bits of hair are going to get all over the place, no matter what you do.

Step Three: Toys and snacks go a long way towards helping your kid sit still. Try to choose toys that you can rinse off, and snacks that aren’t too sticky. Don’t worry about your kid not ingesting enough hair, they totally will.

Step Four: Try to choose a style that doesn’t require a flat iron to maintain, because kids hate those things, for some reason.

Step Five: Cut the most important part first. If the shit hits the fan and you have to bail early, you don’t want a girl with shaggy bangs, or a boy with a wiffle, sideburns and a mullet.

Step Six: Kids do not understand complicated commands like “face forward” or “look down.” But they love riddles and puzzles! Have them move their head the way you want by telling them to “listen to your shoulder” or “try to lick your belly.”

Step Seven: Threats and intimidation go a long way towards keeping your kid from squirming. Before every approach with the scissors or buzzer, remind your child that if they move, they will get cut/look ugly (maximum fear-inducing threat is dependent on the gender of your child).

Step Eight: Get over your fear of blood and your unnatural attachment to your child’s ears. You will nick them at least once a year. Whatever, Band-Aids are way cheaper than a trip to Snip-its.

Step Nine: Make amends.

Step Ten: Tomorrow is crazy hat day! And the day after that, and the day after that, and oh screw it probably the next three or four weeks.

Jenn Rose is a staff writer at In The Powder Room, and stay-at-home mother to one boy in Massachusetts. When she’s not writing or parenting, she’s watching way too much TV and drinking a little too much wine (not chardonnay). She hopes to become a zombie when she dies.
Connect with Jenn on her blog Something Clever 2.0, on Facebook, and on Twitter.


Tips for Tuesday! Learn to run like a motha!


Learning to run? I got your kick ass tips right here!

I know what you’re thinking, “Candy Ass, I didn’t know you were a runner.” Well, I am…aaaand I’m sorta not. For those of you keeping score at home, I’m currently on my third attempt to become a runner.

But before you hit your back button with an “I’m outta here, you obviously don’t know what you’re talking about” attitude, let me ask you this: who do you think has more experience as a beginner, someone who’s quit and restarted several times or someone who tried it once and stuck with it? (hint: several is more than once)

Now for my tips:

There’s an App for That

I highly recommend downloading some sort of Couch to 5k app to help guide and track your progress. There are a ton of great ones out there, so selecting one is usually based on personal preference.

I’m currently using an app called Get Running. I like it for its straight forward title and the nice Australian lady who says nicey nice things like “Feel free to slow down”, “You’re almost done” & “Great job!” (even though I’ve almost always slowed down). I find Australian App people to be laid back and accepting. I hope to visit Appstralia one day.


Shake Your Booty

Create a great playlist, just make sure you choose songs that match your pace. For example, my playlist has a lot of Sarah McLachlan, Eric Clapton, Celine Dione, and Gerry & The Pacemakers – it’s basically a funeral procession mash-up.


Fake it Until You Make It

Buy several awesome running outfits, a sweatband, water hydration thingy,and $200 running shoes. You know what they say, “Dress like a profession, act like a professional.” I’m pretty sure my yoga pants with the holes in the crotch were holding me back all these years.


Find a Running Buddy

Running buddies, when used properly, can be a terrific source of motivation.

How to use your running buddy:

Step 1: Simply turn your running buddy around and instruct her to “Hold still, Lois, and stop your bitching!”

Step 2: Secure a bag of Oreos to her back using heavy duty duct tape.

Step 3: Give her a 20 second head start before running after her like a crazy bitch who wants “…MY GOD DAMN OREOS, LOIS!”


However, if steps 1-3 are a flop because your running buddy sucks and requires a little motivation of her own, simply attach this sign to her back:

Look at Lois go! In fact, the rowdier your kids are, the faster you’ll both move. Now that’s what I call a win-lose situation!

Now get out there and run your little heart out…and bring me back a pumpkin latte.

 
By the way, do you have any tips for me? Lord knows this delinquent runner could use them!
 
Psst…My real playlist, if you’re interested, is:

Cups, Viva la Vida, Titanium, Thrift Shop, Roar, Gone Gone Gone, Royals, Radioactive, Good Life, My Songs Knows What You Did, It’s Time, Set Fire to the Rain, Trouble. See, I wasn’t exaggerating about the slow pace.

Top Mommy Blogs - Mom Blog Directory


My sponsor GiftsForYouNow.com has like a BAZILLION gifts that you can personalize for Christmas (or any occasion). I bet they have a tree skirt for my wine glass.

Follow

Get every new post on this blog delivered to your Inbox.

Join other followers: